|
More difficult but also extremely common is Semee de (powdered with) a pattern.
The Gold collection includes the most common pattern fills in the Design folder
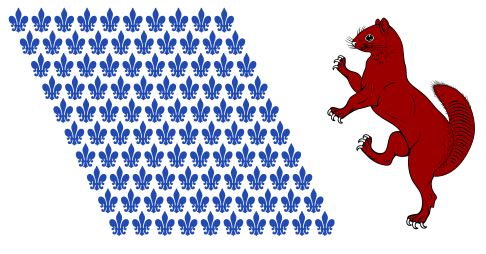
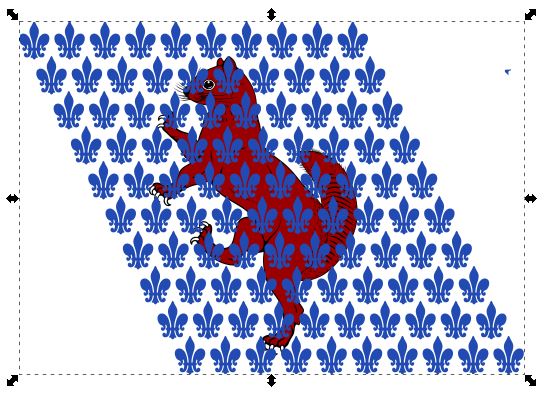
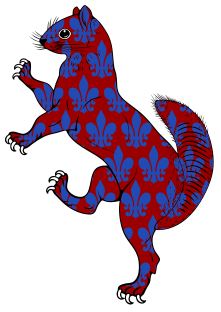
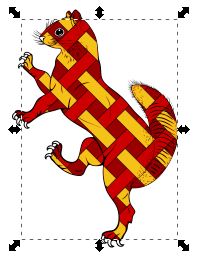
For this example we will use the Squirrel Rampant and the Fleur de Lis pattern to make a Squirrel Rampant Semee de lis.
Start by loading both files into a single Inkscape document.
Size the pattern large enough to cover the entire area to be powdered, remember to hold Ctrl (Windows) while sizing to scale proportionally.
Next ungroup both the pattern and the image. with Object > Ungroup.
After ungrouping all the objects will be selected, click in white space to clear the selection before continuing.
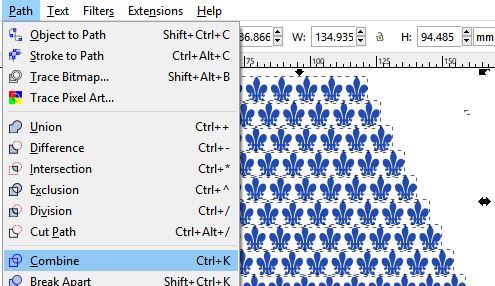
In this case the pattern is made up of more than one object so we need to combine them to make the process easier. Drag a marquee box around all of the pattern objects to
select them and choose Path > Combine
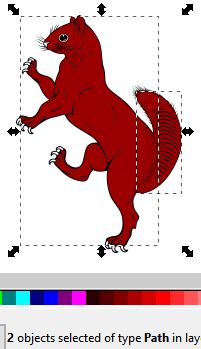
We also want to combine all the parts of the image that need to be powdered. Do not use a marque selection (dragging a box around the while object), select the objects individually
by clicking on the first part and Shift+clicking on additional parts to add them one at a time, in this case select the body and tail and Path > Combine them.
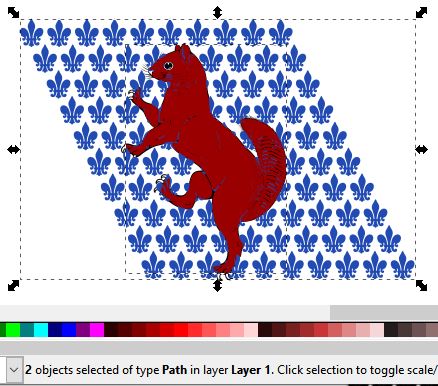
Next scale and position the pattern over the image and align the overlap so that the pattern looks good, in this case I tried to avoid the eye.
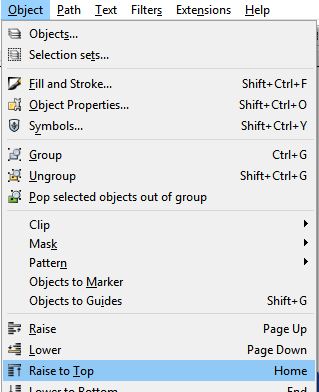
You can use Object > Raise to Top to bring the pattern to the top if needed.
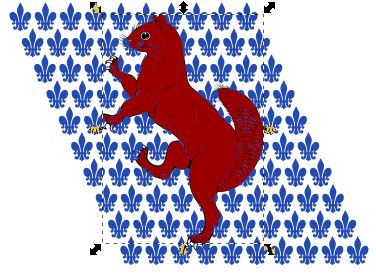
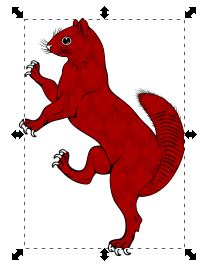
The next step is to create a duplicate of the
body and tail fill, select the body fill and Edit > Duplicate (Ctrl+D). Zoom in if you have trouble selecting the body fill that is under the pattern.
Nothing visible may happen, (depending on the object layering) in this example the duplicate was created above the pattern.
If the duplicate is not on top you may want to bring it to the top with Object > Raise to Top.
Select the patern and the just created duplicate
(with a click on one and a shift+click on the second) zoom in if you have trouble selecting the correct parts. Note that there should be a bounding box around each selected object and at the bottom of the window the status bar should show '2 objects selected of type path...'.
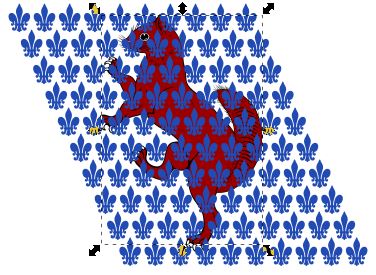
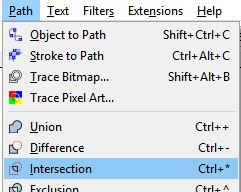
Next select Path > Intersection. the just created duplicate and then Path > Intersection.
If all goes well, its like magic.
If the pattern just seems to disappear, it is likely just the wrong color, with the object still selected from the last step select a contrasting color and the pattern
should become visible.
In some cases you may need to change the object stacking order to get it to look right, the object stacking order options are on the Object menu Raise and Lower. If it
did not work, use undo to go back to before the Path > Intersection command and check object selection and stacking and then try again.
Multi Color Patterns
Multi-color
patterns (checky, vair, nebulee, fretty etc.) can be applied using the same techniques, by repeating the Duplicate Body, Select pattern part, Path > Intersection procedure for each
color and for the black dividing lines.
It's worth noting that the black dividing lines in the complex pattern fills are entirely optional and can be omitted, the black outlines were not included in painted heraldic
art, they are a modern addition that allows the images to be easily rendered without color.
|